Let’s be honest, there is nothing quite as frustrating as a kitchen sink that refuses to drain right in the middle of cleaning up after dinner. When your garbage disposal finally gives up the ghost, replacing it quickly goes from a “maybe next weekend” chore to an absolute emergency. Honestly, wrestling with pipes under the sink isn’t anyone’s idea of a good time, but having a working disposal is practically a survival requirement here in Gilbert.
Why are we even talking about garbage disposals?
Gilbert summers are brutal, and you know what? The absolute last thing you want is a kitchen trash can full of rotting food scraps baking in the Arizona heat. A solid, functioning garbage disposal keeps your kitchen smelling fresh and your pipes flowing. It grinds up those pesky leftovers so they wash harmlessly away. But when it breaks, you’re faced with a sudden choice: call a professional or try installing a new one yourself.
If you’re leaning toward the DIY route, I totally get it. Tinkering under the sink can feel pretty rewarding. We see a lot of local homeowners tackle this project over the weekend. Sometimes it goes great. Other times… well, we end up getting a frantic phone call on a Sunday afternoon.
Let me explain exactly what it takes to swap out that grinding machine under your sink. Knowing the process helps you decide if you really want to get your hands dirty, or if you’d rather pass the wrench to someone else.
What killed your old disposal anyway?
Before you rush out to buy a replacement, it helps to understand why the old unit failed. This is a mild tangent, but it matters. Most disposals last about ten years. If yours died much earlier than that, you might be feeding it the wrong things.
A lot of folks treat their disposals like invincible trash compactors. They aren’t. Fibrous foods like celery strings, corn husks, and potato peels will tangle around the grinding impellers. Coffee grounds act like thick mud in your drain pipes. And pouring liquid grease down the sink? That is a guaranteed recipe for a clogged P-trap and a burnt-out motor.
If your motor just hums loudly and shuts off, it might simply be jammed. You can sometimes fix that with an Allen wrench. But if the motor is completely silent, or if water is leaking straight through the bottom of the metal canister, it is officially time for a garbage disposal replacement.
Getting ready: What you actually need
Before you even think about crawling under those cabinets, you need to gather your gear. There is nothing worse than making three trips to the hardware store on Elliot Road because you forgot a single washer or wire nut. You need the right tools right next to you.
Here is the thing about kitchen plumbing projects: they require a mix of basic hand tools and a little bit of patience.
- The new disposal unit: Make sure it fits your space. A 1/2 horsepower motor is usually fine for a standard home. You might want a 3/4 HP model if you cook heavily for a large family.
- Plumber’s putty: This is the magic clay that seals the sink flange so water doesn’t drip down into your cabinet.
- Screwdrivers: You will definitely need both a flathead and a Phillips.
- Needle-nose pliers: These are super helpful for grabbing stubborn wires or twisting tight clips.
- A bucket and some old towels: Because water is going to spill. It just is. No matter how much you drain the sink, water hides in those pipes.
You might also need a hacksaw if the PVC drain pipes need trimming. Let’s just hope the new unit lines up perfectly with the old plumbing.
The “Out With the Old” phase
Taking out the broken unit is usually where the mess happens. First things first—turn off the power. I cannot emphasize this enough. Go to your electrical panel and flip the breaker. You really don’t want an electrical shock while you’re holding a wet metal pipe. You just don’t.
Once the power is definitely off, unplug the unit if it has a wall cord. If it is hardwired, you will need to open the small electrical plate on the bottom of the disposal and carefully disconnect the wires.
Next, grab your bucket. Disconnect the P-trap—that curved pipe directly under the sink—and let the nasty, trapped water drain out into the bucket. Disconnect the dishwasher drain line if you have one attached.
Now, look up at the mounting ring holding the disposal to the sink. Take your flathead screwdriver, stick it into one of the mounting lugs, and give it a solid, forceful twist counterclockwise. The unit is heavy, so be sure to support it from the bottom with your other hand. It will drop suddenly once it releases. Watch your toes.
The one mistake everyone seems to make
Okay, pay close attention here. If you are hooking up a dishwasher to your new disposal, there is a small plastic piece inside the disposal’s dishwasher inlet tube. Plumbers call it the knockout plug.
You must knock this plug out before you install the disposal under the sink.
Just take a flathead screwdriver, place it against the plug, and tap it firmly with a hammer until it pops inside the disposal chamber. Then, reach inside and fish the plastic piece out. If you forget this step? Your dishwasher simply won’t drain. You will end up with a flooded kitchen floor the next time you run a load of dishes. We fix this specific oversight for Gilbert homeowners all the time. It is such a tiny detail, but missing it causes a massive headache.
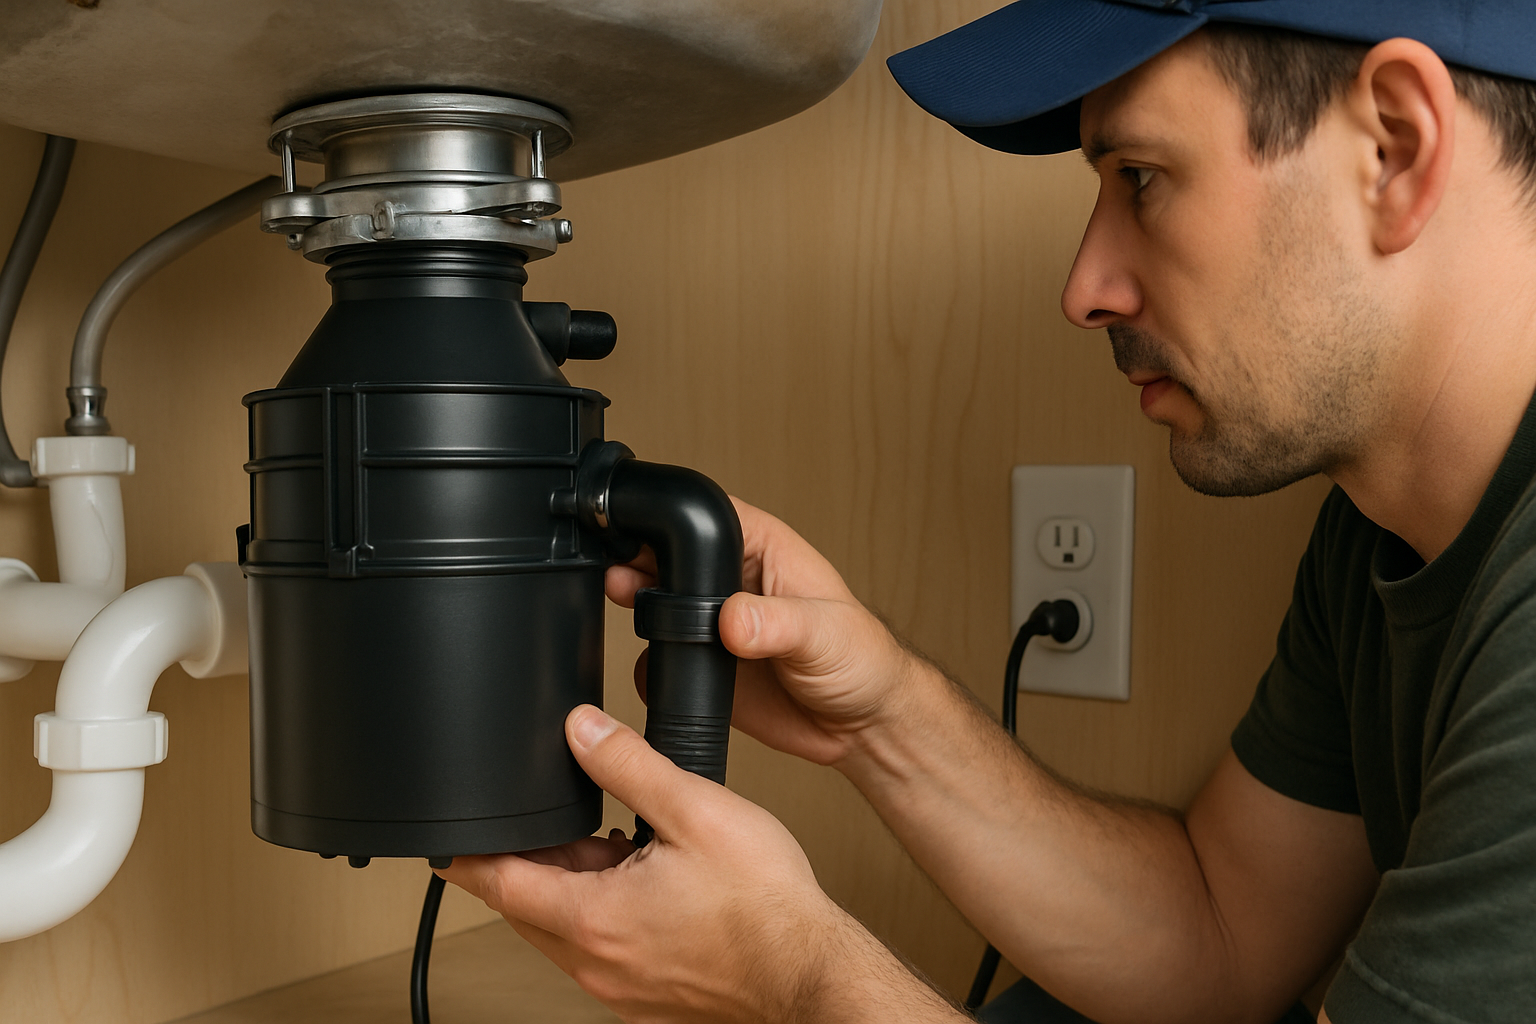
Wrangling the new beast into place
Installing the new unit is basically the reverse of taking the old one out. However, getting it to lock securely into place can be a little tricky.
First, apply a generous snake of plumber’s putty around the rim of the new sink flange. Press it firmly into the drain hole from above the sink. Underneath the sink, slide on the backup ring, the fiber gasket, and the mounting ring. Tighten the mounting screws evenly until the putty oozes out the top inside the sink basin. Wipe away that excess putty with a rag.
Next, lift the heavy disposal unit up to the mounting ring. This is exactly where a second pair of hands is really nice to have. You have to align the three tabs on the top of the disposal with the sloped tracks on the mounting ring. Twist the disposal clockwise until it locks tight. You will probably need your screwdriver again to gain enough leverage to snap it fully into the locked position.
Finally, reconnect your plumbing lines. Attach the dishwasher drain hose and the main drain pipe connecting back to the P-trap. Double-check that all your slip nuts are tight and secure.
Testing, testing… Is this thing on?
You have wired it up, twisted it securely in, and tightened every single pipe. It is finally time to see if it actually works. Go flip the breaker back on. Run the cold water into the sink for a few seconds.
Now, flip the wall switch.
If you hear a smooth, powerful hum, congratulations! You did it. Let the water run for a couple of minutes while checking underneath the sink with a bright flashlight. Look very closely at the slip nut connections and the mounting flange. Water has a sneaky way of finding the smallest gap.
What if things don’t go perfectly? Here is a quick cheat sheet of common post-installation issues:
| What you see (or hear) | What it probably means | How to fix it |
|---|---|---|
| A puddle under the sink | The sink flange isn’t sealed tight, or a drain pipe is loose. | Tighten the mounting ring or re-apply fresh plumber’s putty. |
| A loud humming sound | The internal motor is jammed or bound up. | Use the jam-buster wrench in the bottom hex hole to manually turn the motor. |
| Absolutely nothing happens | The unit tripped its breaker, or a wire is loose. | Press the small red reset button on the bottom of the disposal. |
Knowing when to pass the wrench
DIY projects are great, but plumbing can get complicated quickly. Houses in Gilbert have a wide variety of plumbing setups, especially as you move from the newer builds out by San Tan Village to the older, more established neighborhoods near the Heritage District. Sometimes, the old drain pipes are corroded and crumble when you touch them. Sometimes, the electrical wiring looks like a total rat’s nest.
If you get under your sink and realize the pipes don’t line up anymore, there is absolutely no shame in stopping. If you feel uncomfortable stripping wires or dealing with the electrical connections, you should definitely pause. Honestly, forcing a bad plumbing connection usually leads to slow leaks. Slow leaks lead to hidden water damage, which eventually leads to ruined cabinets and mold. It is always cheaper and less stressful to hire a reliable local plumber upfront than it is to replace water-logged kitchen cabinets later.
Let Gilbert Plumbing Company handle the dirty work
You know, installing a garbage disposal yourself takes time, patience, and a whole lot of elbow grease. If your weekend is already packed with family activities, or if wrestling with dirty pipes just doesn’t sound appealing right now, we are here to help. You really don’t have to spend your Saturday swearing at a stubborn leaky pipe.
At Gilbert Plumbing Company, our local experts can easily swap out your old, jammed-up unit and install a brand new, powerful disposal in no time. We will make absolutely sure the plumbing is watertight, the electrical is perfectly safe, and yes, we will even remember to punch out that tricky little dishwasher knockout plug. We want to give you back your precious free time and provide the peace of mind that the job was done right the first time.
Ready to hand this messy chore over to the pros? We would love to hear from you.